The something new for this week is knitting with beads. I bought some a while back to give it a go and finally managed to pick a yarn and project that called for them.
s
Like everything in knitting I'm sure there are a lot of ways to use beads when you knit, this is just one method, it is given in the pattern for Bead the cable by Lykkefanten (which is what I am making) and positions a single bead between two vertical rows of knit stitches. Details are given for working in the round, the beading pattern is worked over four rounds.
s
First up pick your yarn and beads. The hole in the bead needs to be big enough to allow the yarn to be threaded through, but not hugely big.
Thread enough beads onto the yarn for the project before you start knitting, maybe add a couple of extras in case of counting errors or broken beads, its easier to add a few at the start than when you are knitting.
s
 s
sThe set up for this project gives the beading area a P1, K2, P1, but as long as there are two knit stitches to work between that will be fine. The following will assume you are working with a K2, but it could easily be K4 or more.
s
Round one:
Round one:
Work until the K2 is reached, knit the first stitch then make a stitch: lift the yarn between the needles onto the left needle by poking front to back...
s
 s
sThen knit the back leg of this loop to make a stitch.
s
 Knit the third stitch (previously the second stitch). Repeat this around the round in each location you want a bead.
s
Round two:
Work until you reach the K3 where the bead is to be placed. Knit the first stitch.
Bring the yarn to the front of the work (as if you are going to purl) then slide a bead along the yarn.
s
 s
s
Slide the bead all the way along until it is sat snugly against the right needle.
s
 s
s
Slip the next stitch- poke your needle in as if you are going to knit it and slide it off the left needle onto the right.
s
 s
s
Take the yarn to the back of the work (as if you are going to knit). Keep the bead at the front of the and make sure it sits snugly on the work.
 Knit the third stitch (previously the second stitch). Repeat this around the round in each location you want a bead.
s
Round two:
Work until you reach the K3 where the bead is to be placed. Knit the first stitch.
Bring the yarn to the front of the work (as if you are going to purl) then slide a bead along the yarn.
s
 s
sSlide the bead all the way along until it is sat snugly against the right needle.
s
 s
sSlip the next stitch- poke your needle in as if you are going to knit it and slide it off the left needle onto the right.
s
 s
sTake the yarn to the back of the work (as if you are going to knit). Keep the bead at the front of the and make sure it sits snugly on the work.
You have wrapped the slipped stitch with the bead sat on the wrap.
s
 s
s
Knit the third stitch of the K3. Work around the round repeating this process at each bead location
s
 s
s
Round three: s
s
Round four: s
s
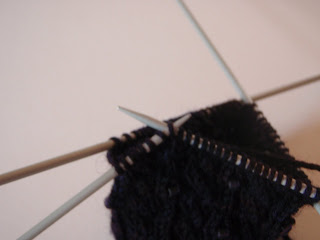
I apologise for the picture quality, I need to organise some better lighting. This yarn is also my photographic nemesis- in real life is is a very dark purple with bits of plum, blue and black but I can't seem to get a decent picture!
s
 s
sKnit the third stitch of the K3. Work around the round repeating this process at each bead location
s
 s
sRound three:
Work to the K3.
Knit the first stitch then knit the next two stitches together, decreasing them back to one.
Repeat around the round at each bead location.
s
s
 s
sRound four:
Work to the bead location and K2.
Repeat around round at each bead location.
s
The process can be repeated to add more beads as required. In the "Bead the Cable" pattern vertical rows of beads sit between cables, the beads in alternating rows are offset.
s
s
The process can be repeated to add more beads as required. In the "Bead the Cable" pattern vertical rows of beads sit between cables, the beads in alternating rows are offset.
s
 s
sI apologise for the picture quality, I need to organise some better lighting. This yarn is also my photographic nemesis- in real life is is a very dark purple with bits of plum, blue and black but I can't seem to get a decent picture!
I watched a lady do this a few months ago at a festival I was selling at. She was teaching a class on this technique. I have to admit that I tried knitting with the yarn I spun the beads into and I ended up tearing it out. The beads didn't land where I wanted them to. This would solve that.
ReplyDeleteThanks for the great instructions.
It is an easy way to get them to sit where you want, and there is no way they are going to move. It does slow the knitting down a litt, but that is not always a bad thing :)
ReplyDelete*little
ReplyDelete